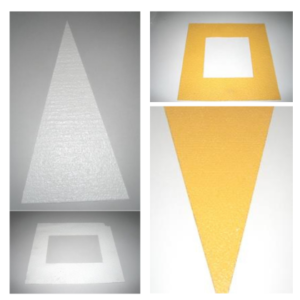
Description
AWIS PREFORM: Installation Instructions
Are you wearing the correct safety equipment?
- Are you wearing a reflective vest or
- High Visibility Clothing.
- In order to prevent burns, wear all Safety Apparel, AS approved shield or minimum safety glasses, AS approved Gloves, Long Sleeved Shirt and Trousers.
- Safety Boots.
- Eye protection when handling the Preform Primer
- Any other equipment deemed necessary by your Company or Client.
Correct Handling and Storage of the product.
- The product is to be stored in a cool location out of direct sunlight.
- The product has to be handled and carried correctly to prevent damage, it is flexible but it has to be handled with care. The boxes of material are to be carried on their side to prevent any flexing or bending of the box.
Equipment required for Installation:
- Gas torch with sufficient gas.
- Subject to the type of Preform to be installed the following may be needed:
Tape
Chalk Line
Sharp Knife
Torch lighter
Cutting ruler - Glass Bead – Grit Mix (70/30)
- Water. (Safety/ first Aid)
- Preform Primer for application to Concrete.
Installation on Asphalt Surfaces
- Identify the site.
- Accurately locate the site for installation.
- Make sure the site is suitable for the installation.
- Make sure that the surface is dry. It is difficult to say how long after a downpour Preform Thermoplastic laying can commence. There are many factors that can affect the drying up process after rain fall and heavy mist e.g.
Duration of rainfall and how heavy.
Humidity and ambient temperature.
Cloudy or sunny day.
Conditions and type of road surface.
A good guide would be 24hrs drying time. - Carry the Preform to the installation Site.
- Open the box and remove the Preform and lay it on the site.
- Mark out the job and check the alignment.
- Place the Preform on the area to be marked.
- Using a 60mm Gas Burner, heat the Preform material evenly ensuring no overheating or heating on one spot, by adjusting the flame and distance from the Preform. Heat required to melt the Preform to give adhesion is about 180º C (depending on the temperature of the substrate.)
- A 30mm Burner Head to be used when installing small less than 100mm pieces.
- Complete heating by going over the edges with the flame to ensure edges are melted and adhesion is completed.
- Apply the Glass Bead mix to the molten Preform
- If required apply water to cool the Preform
- Cooling will take about 5 minutes depending on ambient temperature.
- Carry out the chisel test to ensure sufficient bond to the surface.
- Reseal the box of unused Preform and store away.
- Pack up and re stow your equipment.
- Relocate to the next location and repeat the installation process.
Installation on Concrete Surfaces
- Two (2) coats of Primer must be used to bond the Preform to the Concrete, Recycled Plastic, Metal and Brick surfaces.
- Apply one coat with a brush or roller depending upon size of surface area, allow for drying 10 min in summer and up to 20min in winter. Always allow 30mm plus over the size of the Preform that you are going to lay.
- YOU MUST APPLY A SECOND COAT OF PRIMER TO MAXIMIZE THE
FULL BONDING OF THE PREFORM. - Once you have placed the Preform in position follow the above instructions on
using the 60mm Gas Burner.
For Technical enquiries:
Please contact AWIS, Landline: +61 3 9720 2803 Email: info@awis.com.au
A: PO Box 98 Bayswater VIC 3153


There are no reviews yet.